
The examples in the instructions in ReadMe.txt (included in the SVBus download) focus on installing Windows to a blank disk. If a Windows Operating System is already installed then SVBus can be used to install a different version of Windows to a Virtual Hard Disk (VHD) - creating a multi-boot setup. The instructions in this page can be adapted to install Windows NT 6.*/10.*/11.* (Windows 7/8/8.1/10/11) alongside an existing Windows NT 6.*/10.*/11.* setup.
NOTE - the ThinkPad W530 test system with BIOS set to boot in CSM mode was used in this walkthrough.
NOTE - Windows 10 (1703) or newer is required to create and mount a multiple partition USB disk if a removable type disk is used.
The following table has been included as a reference to devices, files and paths that are used in the instructions in this page -
| GRUB4DOS Device + path |
Windows Mountpoint + path |
Notes |
|---|---|---|
| (hd0,0) | N/A | Boot partition - not allocated a drive letter in Windows |
| (hd0,1) | C:\ | Windows Host Operating System. |
| (hd0,2) | D:\ | Target partion for VHD file. |
| (hd0,2)/windows.vhd | D:\windows.vhd | Virtual Hard Disk (VHD) - this will be created in step 2 (see here). |
| (hd0,2)/svbus | D:\svbus | Path to SVBus driver files - used in step 4 (see here). |
| N/A | E:\ | Mount point for Windows Installation Media .iso file (Windows 8.1 source) |
| N/A | E:\sources\install.wim | Source file containing sysprepped Windows installation. This will be required in step 3 (see here) |
| N/A | E:\sources\dism.exe | dism version matching the source files. Please note that bit type (32-bit/64-bit) will also match the source. If the source is 64-bit and the host OS is 32-bit then it will not be possible to run this version of dism. This may be required in step 4 (see here) |
| N/A | V:\ | Mount point for VHD partition 1 (used for boot files) |
| N/A | W:\ | Mount point for VHD partition 2 (used for operating system files) |
In addition to the files and devices above, a GRUB4DOS\GRUB4EFI bootable USB drive is also recommended - preferably a fixed type external disk.
Create a bootable USB drive - this process is covered in more detail here.
This process and Diskpart usage is covered in more detail here.
The following DiskPart commands were used (change size, filename, path and mount points according to your own requirements) -
A VHD with two partitions is used as this supports booting the same file on UEFI and BIOS firmware. The first partition (FAT32 file system) will be used for the boot files required to load the operating system located in the second partition when the VHD is mapped using GRUB4DOS/GRUB4EFI (see here for more information).
NOTE - the virtual disk file must be contiguous. If the file is fragmented then it cannot be mapped using GRUB4DOS. [NOTE - GRUB4DOS version 0.4.6a is now reported to support mapping non-contiguous files]
Use DISM to apply (extract) the contents of E:\sources\install.wim to W: (the second partition in the VHD file was mounted as volume W: in the preceding step) - adjust Index\Image number as required.
Alternative using wimlib -
The SVBus driver can be installed to an offline system using the DISM tool. E.g. -
Output -
More detailed information about using DISM to install the SVBus, including errors linked to requiring the latest version of DISM, is available here
Use the bcdboot command to create boot files on partition 1 of the VHD file (see here for more information).
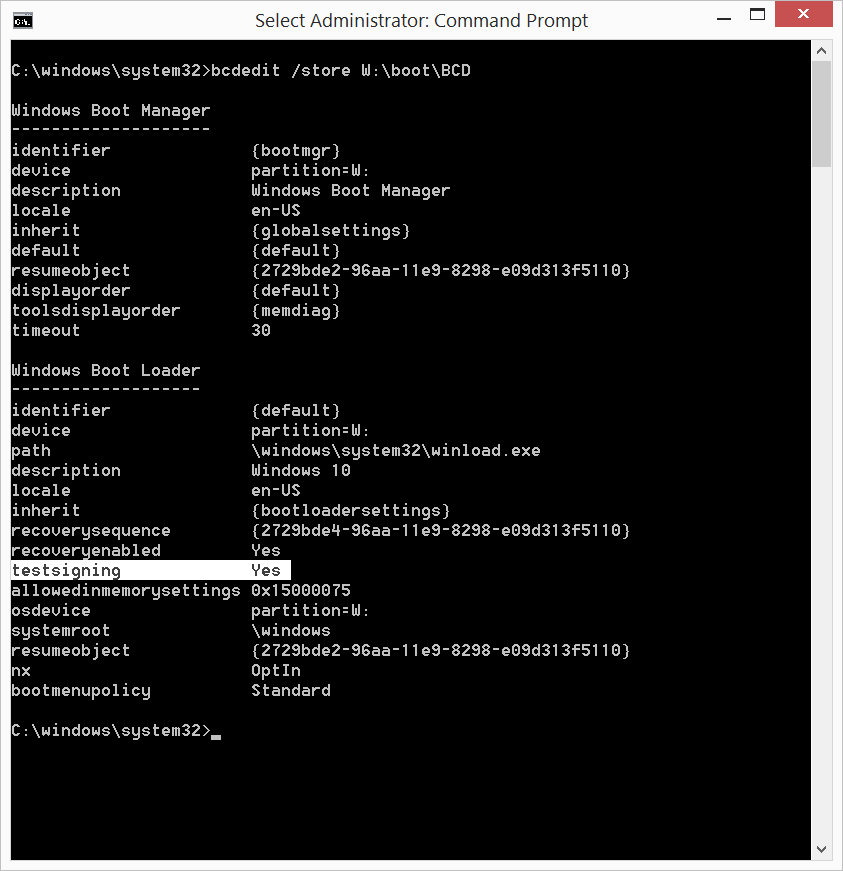
NOTE - SVBus version 1.3 uses a digitally signed driver which does not require testsigning. Ignore this step if using version 1.3.
Unless a digitally signed version of SVBus is installed, testsigning must be enabled in order to successfully boot the Virtual Hard Disk (see here).
See here for more information about the configuration file \menu.lst, including potential issues with multiple configuration files on the same system.
Add the following entries to R:\menu.lst (if the instructions here were followed there should be an existing file with an entry for WinPE) -
Note the use of the map --top --mem command. The following information has been copied from the rmprepusb site - "...In grub4dos, the memory is divided into...3.25G high memory and low memory ends 3.25G mirroring can not cross this point. If your memory is less than 3.25G, you do not have the high-end memory available..." README_GRUB4DOS.TXT states "...map --top option to be used with --mem. map --mem will try to allocate memory at highest available address..."
Using high memory is recommended when booting 32-bit Operating Systems from a RAM Disk as 32-bit Windows can only access/address the first 3.25 GiB of RAM - this is approximate as available RAM may vary depending on BIOS limitiations and memory allocated to shared graphics.
Using high memory (map --top --mem) will ensure that all RAM below the 3.25 GiB level is accessible to 32-bit Operating Systems - this assumes that there is enough high memory to hold the virtual disk image.
Add the following entries to R:\EFI\grub\menu.lst (if the instructions here were followed there should be an existing file with an entry for WinPE) -
Note the use of the map --mem --top command - see here for more information.
See here for more information about the configuration file \EFI\grub\menu.lst, including potential issues with multiple configuration files on the same system.
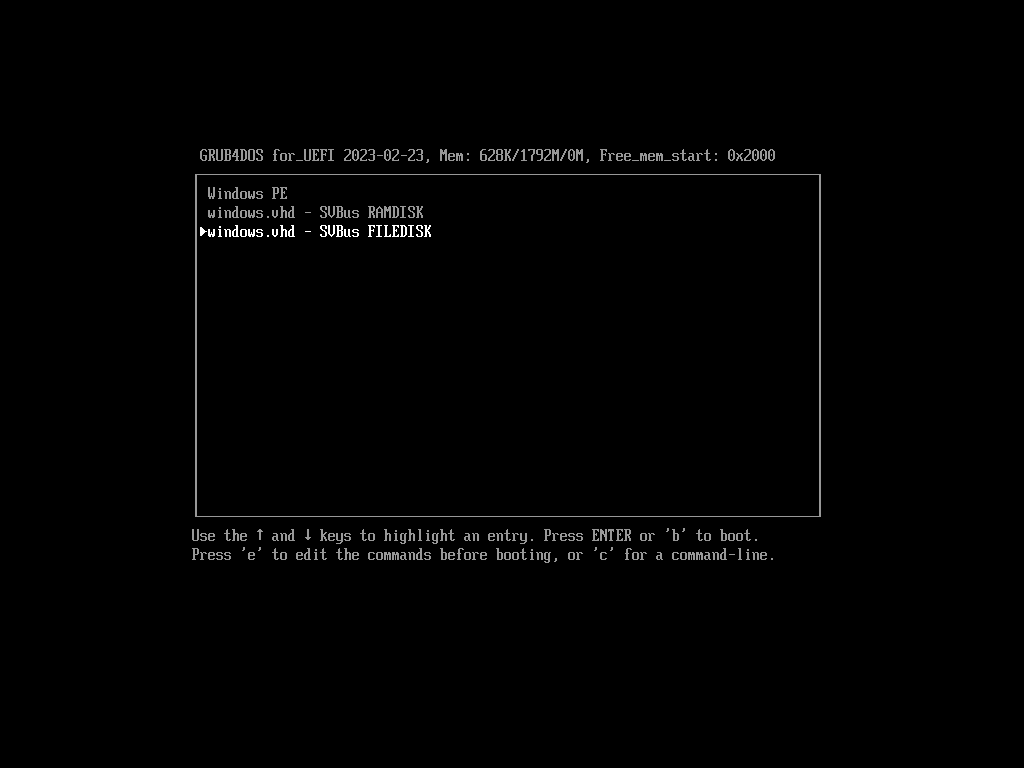
Boot/load GRUB4DOS/GRUB4EFI and select the windows.vhd - SVBus FILEDISK menu entry. Windows may reboot several times during the installation - ensure that you boot GRUB4DOS/GRUB4EFI and select the windows.vhd - SVBus FILEDISK following each reboot.

The installation process is completed once the desktop is accessible.
The SVBus developer recommends disabling hibernation - this step should be taken when the installation is completed, prior to rebooting or shutting down the Operating System. Open a command prompt (run as administrator) and execute the following command -
Following the installation, Windows can be booted by first booting GRUB4DOS\GRUB4EFI and then selecting either the windows.vhd - SVBus FILEDISK or windows.vhd - SVBus RAMDISK menu entries.
Windows 8.1 Update running from SVBus FILEDISK -
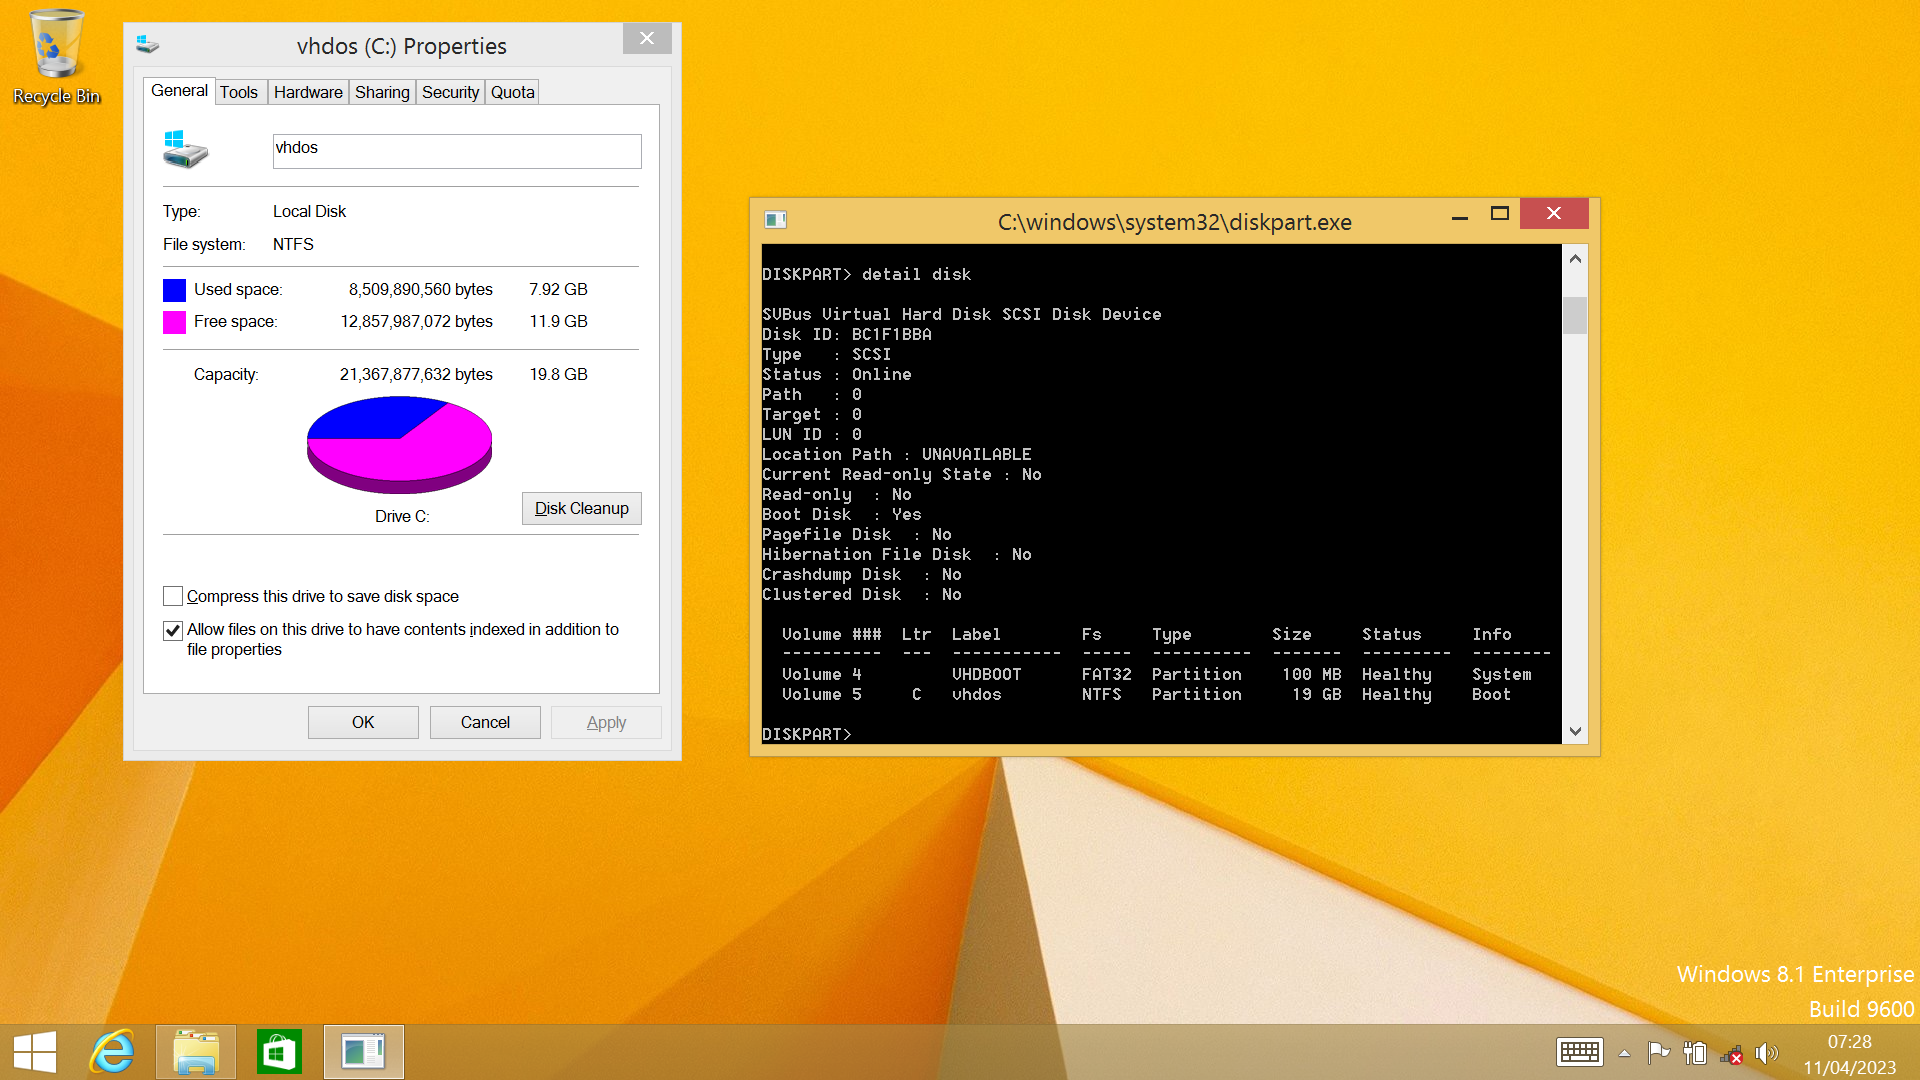
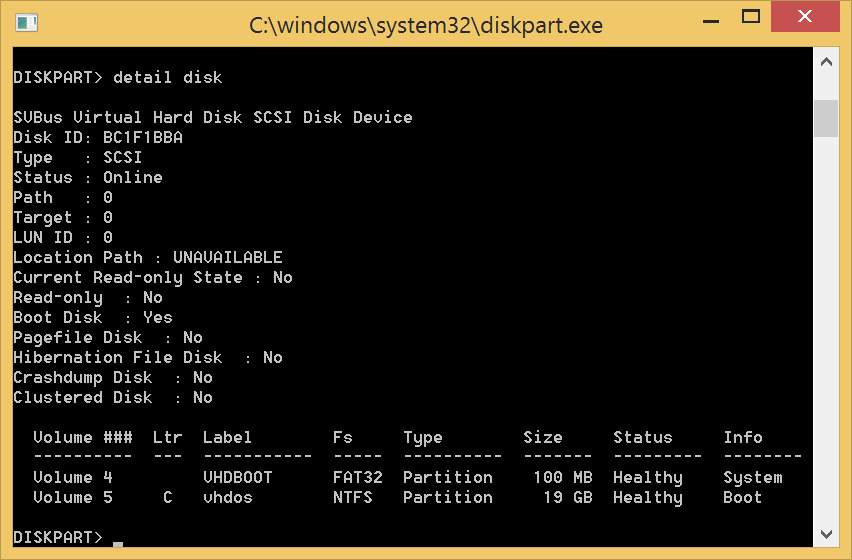
DiskPart output - SVBus FILEDISK boot. Note the selected disk description (SVBus Virtual Hard Disk SCSI Disk Device) -
Document date - 12th April 2023